![]() Creating Credits
Creating Credits
Your QuickPractice software will allow you to create both patient and insurance credits within the payment component.
When a patient file has an unused credit, the negative balance it creates is indicated by red numbers from within the payment screen. Refer to the screenshot below for an example.
Typically, credits are created in one of three ways.
Creating patient and insurance credits is useful whenever a patient pays "money down" on services that have not yet been rendered. Once the credit is in place, a payment memo is kept in the system. Click here for more information regarding applying exiting credits from the payment and charges screen.
To create a credit on a patient's file, follow the steps below.
1. Navigate to the Payments tab within a selected patient file. Click the Add button.
2. Select the appropriate Payment Method for the type of credit you wish to create (patient or insurance).
3. Enter the dollar amount of the credit you wish to create.
4. From the calendar on the left, select the date to be linked to the payment being entered.
5. Without typing anything into the Apply field next to the service line, click the Record button.
Note: There may not be any balances displayed at all if neither the patient or insurance owe any outstanding balances. The payment may still be recorded and stored as a credit to be applied at a later time.
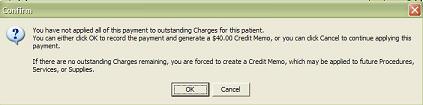
6. The software will prompt you to confirm the credit memo being created. Click Yes.
7. If you have correctly entered the credit into the system, the software will indicate the available credit in red lettering next to the Unapplied Payments label.
Credits are also created when a payment is not fully applied. This often happens whenever the payment amount is greater than the balance shown.
1. From within the Payments screen, select the Payment Method you wish to use.
2. Enter the dollar amount of the payment being received.
3. Select a date for the payment being made.
4. In the Apply field, type in the amount you wish to apply. This amount should be less than the full amount of the received payment.
5. Click the Record button.
6. If the amount of the amount applied is less than the entire received payment, the software will again prompt you to confirm the created credit.
Finally, credits are also created whenever a payment has been fully applied, but then unapplied at a later time.
1. Navigate to the Payments tab within a selected patient file. Highlight a previously entered payment and click on the Edit button.
2. To un-apply a payment, remove the check mark from each desired service line.
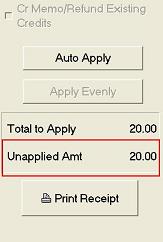
3. As you un-apply each payment, the dollar amount next to the Unapplied Amount label will climb.
4. After you have finished un-applying each desired payment, click the Record button.
5. The software will prompt you to confirm the credit memo being created. Click Yes.